Managing multiple users
This section will walk you through managing multiple users for a single dashboard once embedded in your product

Now that you have embedded your first dashboard, let us see how to show different users their data on the dashboard they view. In order to do this, we first need to learn about the 2 different ways you can pass data into the system:
User metadata
This is data about the user that usually doesn’t change often. This could be used to store data about:
- The organization the user is part of
- The different teams the user is present in
- The authorization token used for authenticating the user
Here is a code sample of how to set it up:
// setting user parameters
await onvo.embed_users.upsert("123456", {
  name: "John appleseed",
  email: "john@appleseed.com",
  metadata: {
    group_id: 585,
    authorization: "Bearer jgsfchjkhg",
  },
});
Session parameters
This is data about the session that could change more often, like sorting or filtering preferences. This could also store data of what team/group a user has selected in your application.
Here is a code sample of how to set it up:
// setting session parameters
let session = await onvo.sessions.upsert({
  parent_dashboard: "yutc67taci87tads8",
  embed_user: "123456",
  parameters: {
    year: 2023,
    sorting: "asc",
  },
});
Using the parameters
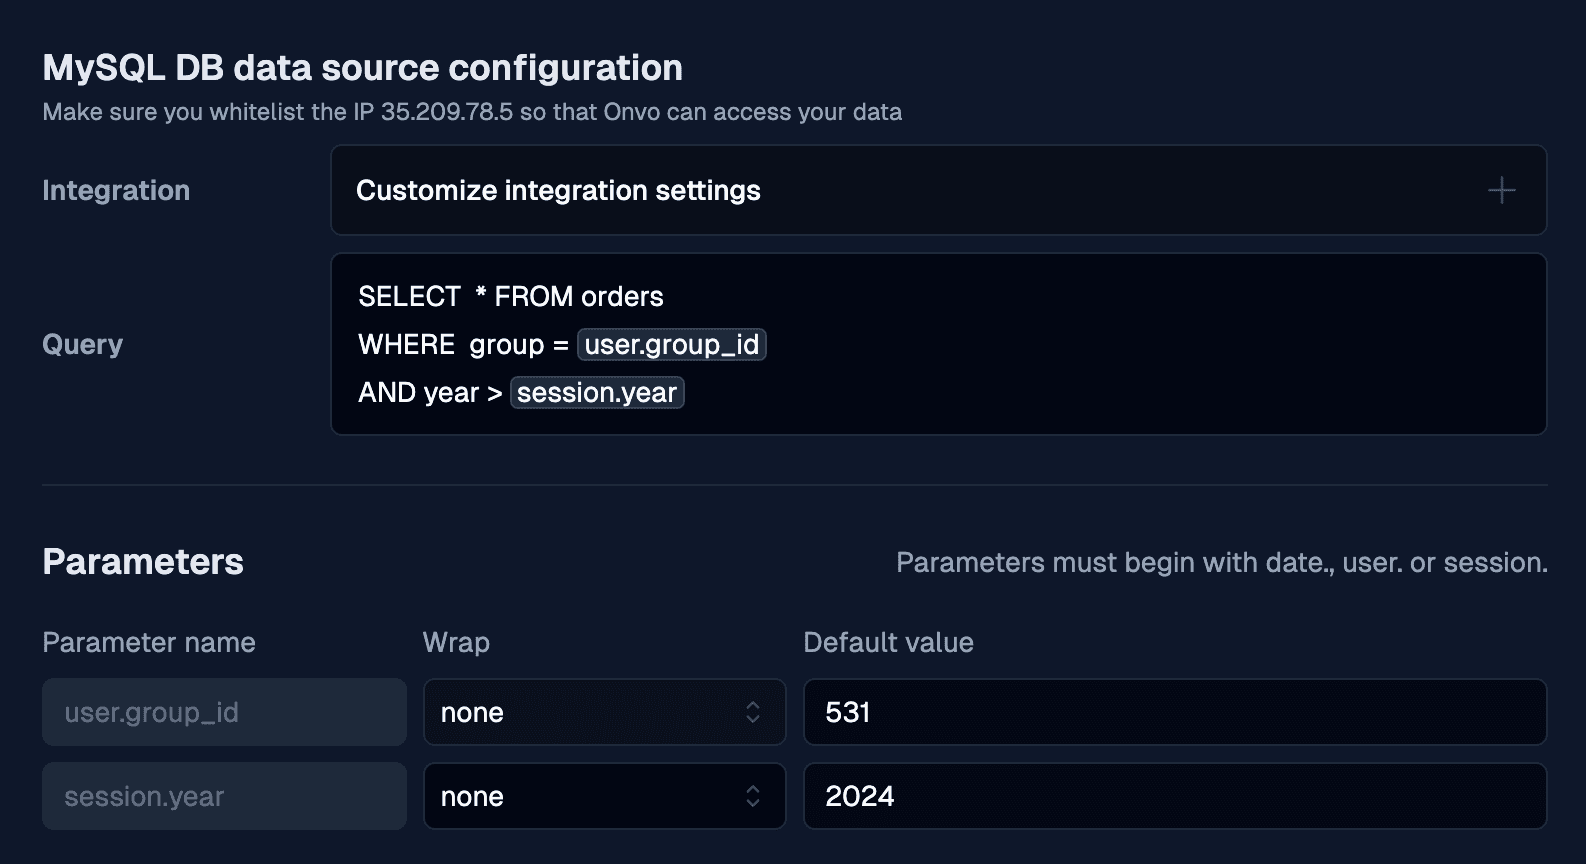
Now that you have setup the parameters, let us learn how to use them. In order to only fetch data based on these parameters, head over to the datasources page.

Here, use the parameters you set up as variables in your data fetch request. In this example, we are looking at an SQL datasource but it will work the same way on any other database or API call. Don’t forget to setup a default value for testing purposes.
1. Embed user metadata

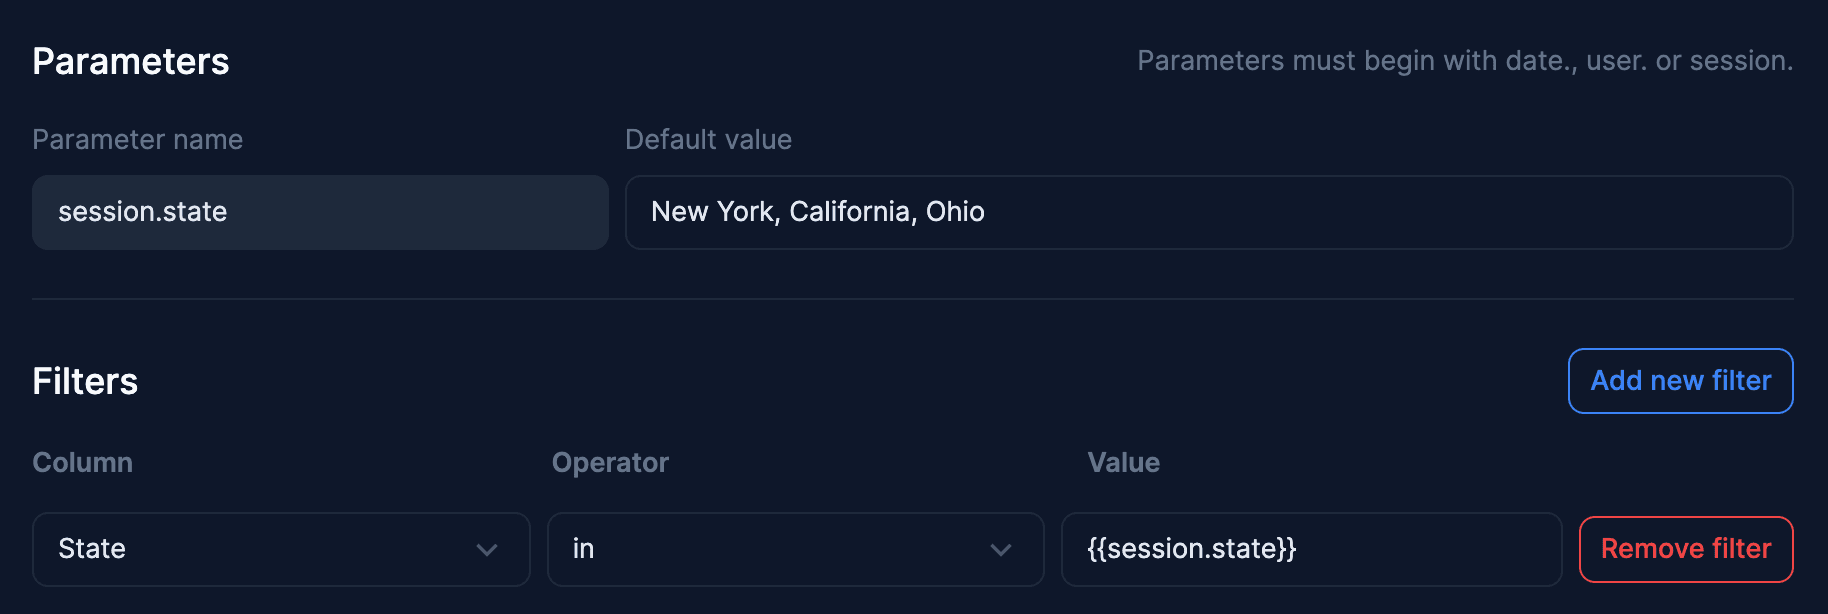
You can set up an embed filter by clicking on Add new filter and then setting up your filtering criteria. You would do this by selecting the column you want to filter, the operator you want to perform and the embed user value you want to filter by. You will have to set it up using {{user.<parameter-name>}}.
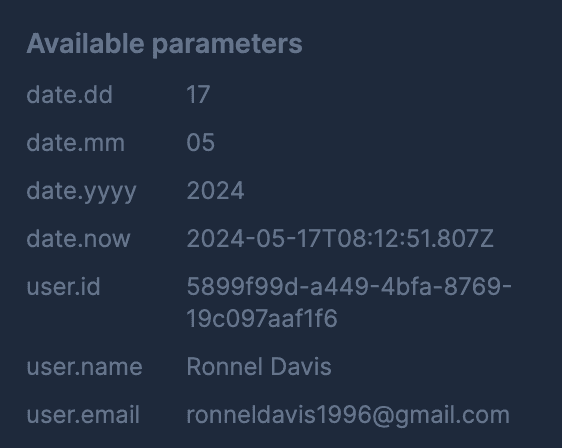
Onvo already passes in the user id, email and name but you can also add your own user parameters by following this tutorial. If you are using a custom embed user parameter, be sure to set up a default value in the parameters section.
2. Session parameter

You can set up a session filter by clicking on Add new filter and then setting up your filtering criteria. You would do this by selecting the column you want to filter, the operator you want to perform and the session value you want to filter by. You will have to set it up using {{session.<parameter-name>}}.
You can set up custom session parameters by following this tutorial. Make sure to set up a default value for each session parameter in the parameters section.
You can also filter by embed user metadata alongside session parameters.
List of all default parameter values
You can find a list of all the default parameters values on the sidebar on the right hand side of the page.

Now if you load the dashboard for different users, you will see that they only have data that you have setup to show them.